Homemade Yogurt Bites
Highlighted under: Vitality Kitchen
I love making homemade yogurt bites because they are a delightful and healthy treat that I can enjoy any time of the day. As a busy person, I appreciate a quick snack that not only satisfies my sweet tooth but also provides nutritional benefits. These yogurt bites are incredibly easy to customize with my favorite fruits and nuts, making each batch unique. Whether I’m preparing them for a snack or a party treat, they always receive rave reviews from friends and family.
Every time I make these homemade yogurt bites, I find myself amazed at how simple yet delicious they are. The process is so straightforward that I can whip them up in just a few minutes, even on busy days. I typically use Greek yogurt for its rich texture and tangy flavor, which adds an exciting twist to the finished bites. A pinch of honey sweetens them nicely without overpowering the yogurt’s natural taste.
One of my favorite tips is to add a sprinkle of cinnamon or a splash of vanilla extract to the yogurt before freezing. This little touch elevates the flavor profile and makes these bites extra special. Plus, I love experimenting with different toppings, like crushed nuts or dried fruits. Each variation is a new adventure for my taste buds!
Why You Will Love These Homemade Yogurt Bites
- Creamy texture that’s refreshingly light and satisfying
- Customizable with your favorite fruits and flavors
- Perfectly portioned for a quick snack on-the-go
The Role of Yogurt in Yogurt Bites
Greek yogurt is the star ingredient in these yogurt bites, contributing to their creamy texture and tangy flavor. While the fat content of the yogurt can vary, I recommend using full-fat Greek yogurt for the richest mouthfeel. Non-fat or low-fat versions are also viable, although they may result in a slightly less creamy end product. Ensure you choose plain yogurt to avoid adding unnecessary sugars that could alter the flavor of your bites.
Additionally, Greek yogurt is packed with protein, which helps keep you feeling full longer. This is especially valuable if you're enjoying these as a snack between meals. For a plant-based option, consider using coconut yogurt or almond milk yogurt, but keep in mind that the texture may differ, and additional adjustments might be needed to achieve the desired consistency.
Customizing Your Yogurt Bites
One of the best aspects of this recipe is how easily it adapts to various flavors and preferences. Consider experimenting with different fruits such as mango, pineapple, or peaches for a tropical twist. If fresh fruits aren't available, frozen options work wonderfully; just be sure to thaw and drain excess moisture to avoid watery bites. You can also substitute the honey with maple syrup or agave nectar for a different sweetness profile while keeping it vegan.
In addition to fruits, nuts add an enjoyable crunch and are a great source of healthy fats. Opt for walnuts, almonds, or even seeds like chia or flaxseeds, which can enhance the nutritional value. A pinch of cinnamon or a dash of cocoa powder can also provide a delightful flavor boost. Take the time to think about your favorite combinations; this is your opportunity to create something uniquely suited to your taste!
Freezing and Storage Tips
Once your yogurt bites are completely frozen, you can store them in a freezer-safe bag for up to three months. To avoid clumping, allow them to cool completely before transferring them into the bag, and remove as much air as possible before sealing. This step is essential to maintain their texture and prevent freezer burn. I also recommend labeling the bag with the date, so you can keep track of their freshness.
If you're making these yogurt bites for a gathering, consider a quick defrosting method. Remove them from the freezer and allow them to sit at room temperature for about 10-15 minutes before serving, or pop them in the microwave for just a few seconds on the defrost setting. They remain delightful cold, so you can enjoy them straight from the freezer too!
Ingredients
Yogurt Bites Ingredients
- 2 cups Greek yogurt
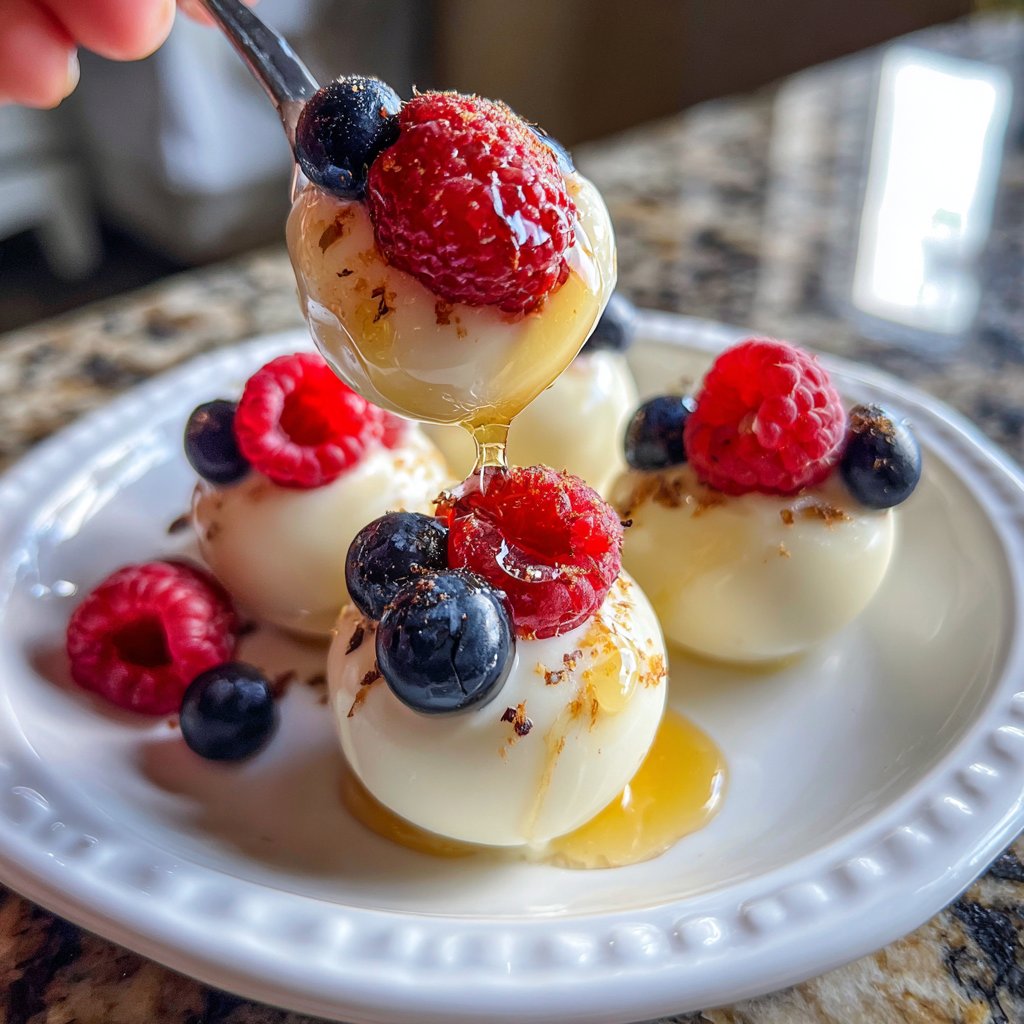
- 2 tablespoons honey
- 1 teaspoon vanilla extract
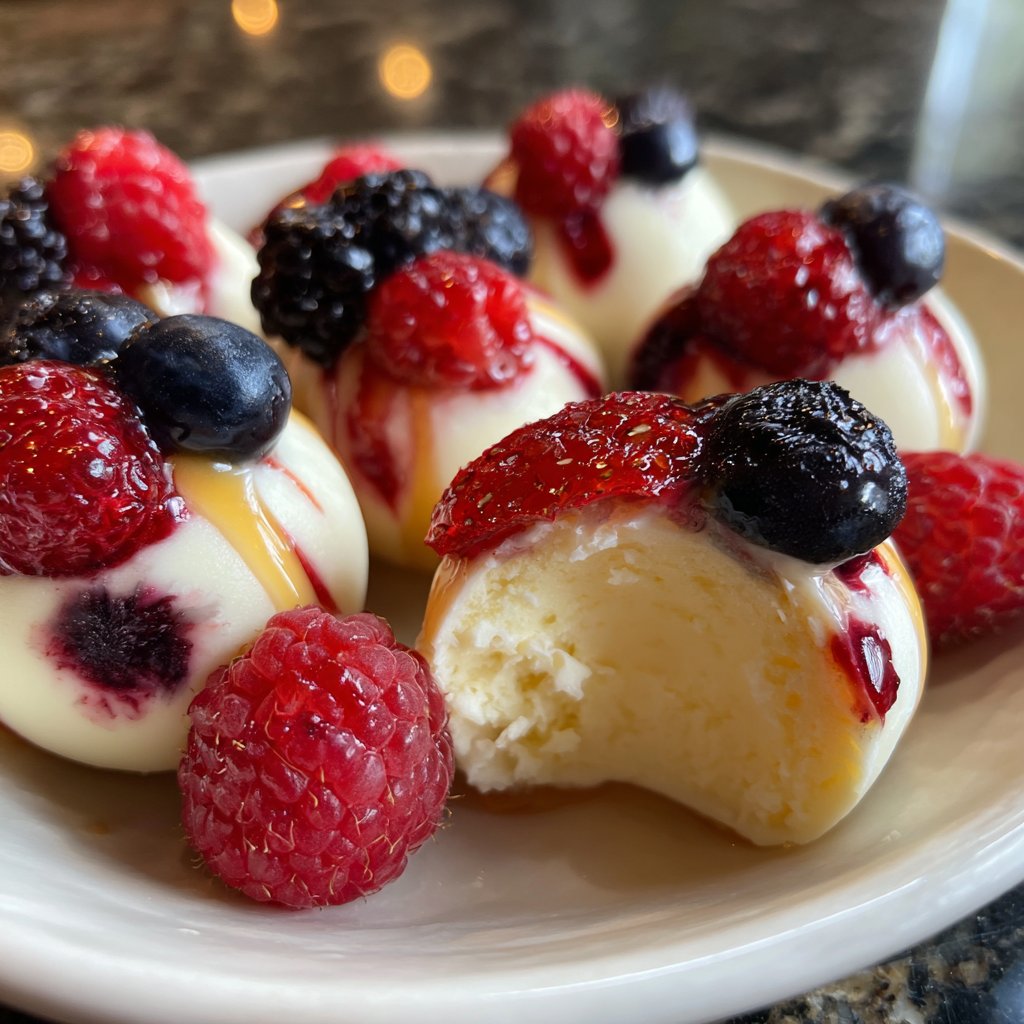
- 1/2 cup mixed berries (fresh or frozen)
- 1/4 cup chopped nuts (optional)
- Pinch of cinnamon (optional)
Instructions
Prepare the Yogurt Mixture
In a mixing bowl, combine the Greek yogurt, honey, and vanilla extract. Stir well until fully blended.
Add Fruits and Nuts
Gently fold in the mixed berries and chopped nuts, if using. Ensure even distribution throughout the yogurt.
Mold and Freeze
Spoon the yogurt mixture into silicone molds or an ice cube tray. Tap gently to remove air bubbles and ensure even distribution.
Freeze Until Set
Place the molds in the freezer for at least 2 hours or until the yogurt bites are completely frozen.
Remove and Serve
Carefully pop the yogurt bites out of the molds and enjoy immediately, or store them in a freezer-safe bag for later use.
Pro Tips
- For an extra burst of flavor, try adding a drizzle of almond or peanut butter over the yogurt bites before serving. They also make a great addition to smoothies or breakfast bowls.
Serving Suggestions
These yogurt bites are versatile on their own, but you can amp up presentation and flavor with accompaniments. Try serving them alongside a drizzle of fruit puree or a dollop of nut butter for a more decadent treat. They're also excellent when paired with granola or served as part of a larger snack platter, making them a hit at parties or family gatherings. Adding a variety of textures alongside the bites can elevate the snacking experience.
If you're feeling adventurous, consider coating your yogurt bites in a thin layer of chocolate or yogurt before freezing. Simply melt some dark chocolate, dip the frozen bites halfway, and return them to the freezer. This extra layer not only adds visual appeal but also creates a delicious contrast between the creamy yogurt and the rich chocolate coating.
Troubleshooting Common Issues
If your yogurt bites turn out too ice-crystal-laden, the main issue could be due to the freezing method; placing them in the freezer too closely packed can prevent even freezing. Ensure there’s enough space between molds in the freezer for air to circulate. Giving your yogurt mix a thorough stir before freezing can help too, as well as checking that the mixture is well combined without lumps.
Should you find your bites too sweet or too tangy, don't hesitate to adjust the amounts of honey or yogurt in the next batch. Balancing flavors can be personal and may require a few tries to find your perfect combination. Document what you've altered each time to recreate your ideal yogurt bites in future batches.
Questions About Recipes
→ Can I use non-dairy yogurt?
Absolutely! Non-dairy yogurt works well in this recipe. Just keep in mind that the flavor and texture may vary.
→ How long do these yogurt bites last in the freezer?
They can be stored in the freezer for up to 3 months. Make sure to keep them in an airtight container.
→ Can I use other fruits?
Yes, you can substitute with any fruit you like, such as bananas, mangoes, or peaches.
→ Are these yogurt bites suitable for kids?
Definitely! These bites make for a nutritious and fun snack for kids, and they can even help make them together.
Homemade Yogurt Bites
What You'll Need
Yogurt Bites Ingredients
- 2 cups Greek yogurt
- 2 tablespoons honey
- 1 teaspoon vanilla extract
- 1/2 cup mixed berries (fresh or frozen)
- 1/4 cup chopped nuts (optional)
- Pinch of cinnamon (optional)
How-To Steps
In a mixing bowl, combine the Greek yogurt, honey, and vanilla extract. Stir well until fully blended.
Gently fold in the mixed berries and chopped nuts, if using. Ensure even distribution throughout the yogurt.
Spoon the yogurt mixture into silicone molds or an ice cube tray. Tap gently to remove air bubbles and ensure even distribution.
Place the molds in the freezer for at least 2 hours or until the yogurt bites are completely frozen.
Carefully pop the yogurt bites out of the molds and enjoy immediately, or store them in a freezer-safe bag for later use.
Extra Tips
- For an extra burst of flavor, try adding a drizzle of almond or peanut butter over the yogurt bites before serving. They also make a great addition to smoothies or breakfast bowls.
Nutritional Breakdown (Per Serving)
- Calories: 50 kcal
- Total Fat: 1g
- Saturated Fat: 0g
- Cholesterol: 5mg
- Sodium: 30mg
- Total Carbohydrates: 8g
- Dietary Fiber: 1g
- Sugars: 3g
- Protein: 4g